

I’ve previously written about our Words Their Way routines and shared several resources. This year we made a few changes that I wanted to share.
Changes 1-6: Organization and Routine
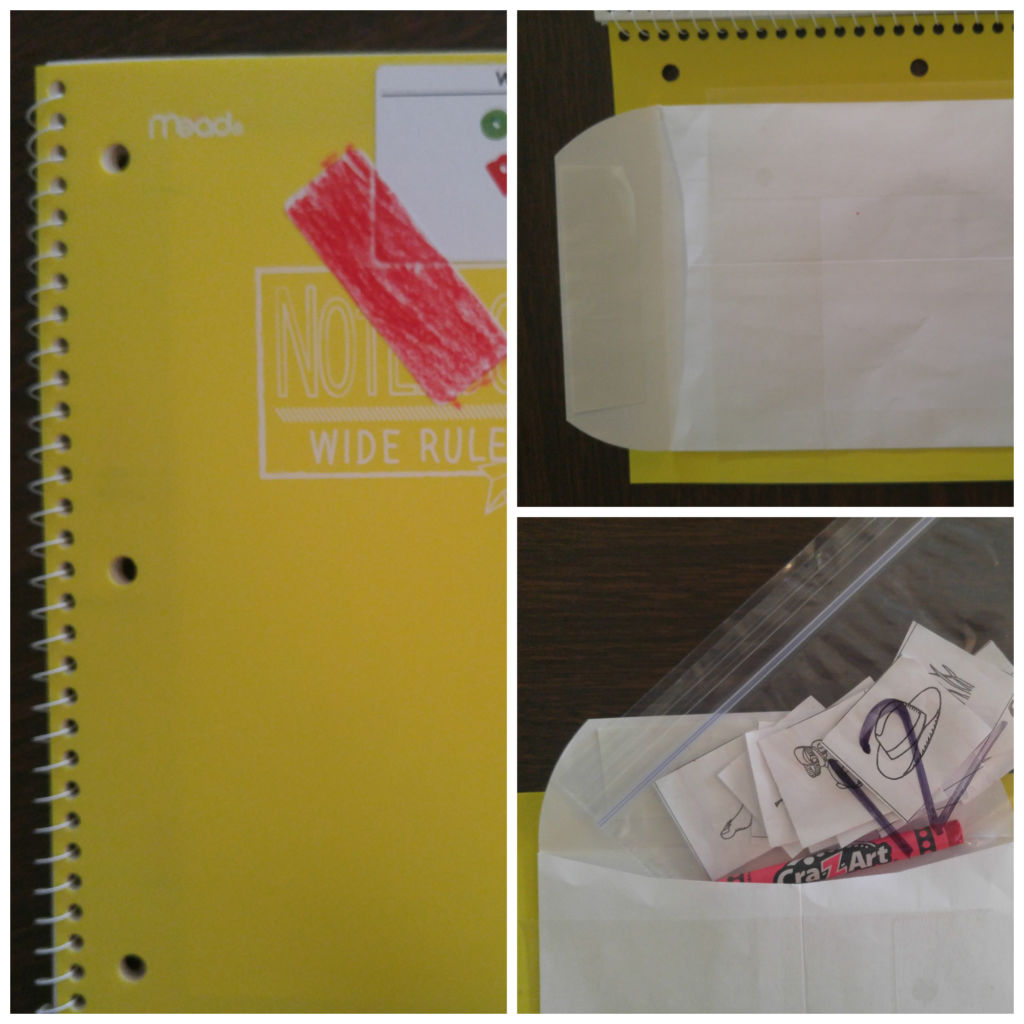
- Don’t Cut Inside Envelop
- Add a Crayon Color Label
- Add Student Number to Baggie
- Display Notebooks
- Batch Prep Sorts
- Store Sorts Conveniently
Have you ever wondered why it took you so long to figure something out? I’m in my 20th year of teaching and every year it amazes me the number of changes I make to improve structures and routines. This year I made changes to our Words Their Way routine that not only save time, but also increase our productivity.
First up are three changes made to student notebooks. In years past I used to cut the inside envelop so it was easier for students to remove the contents of their envelop. This year, to save time, I didn’t do that and it’s working out fine for all involved! This year we also added student numbers to the zipper baggies that house their current sort and crayon. Already this move has alleviated a few would-be-frustrating-moments. I also added a label to the front and had students use their crayon to color it. Now, whenever we find a WTW sort piece on the ground, we simply find the matching notebook, if the owner doesn’t come forward (“Who’s crayon is pink?”).
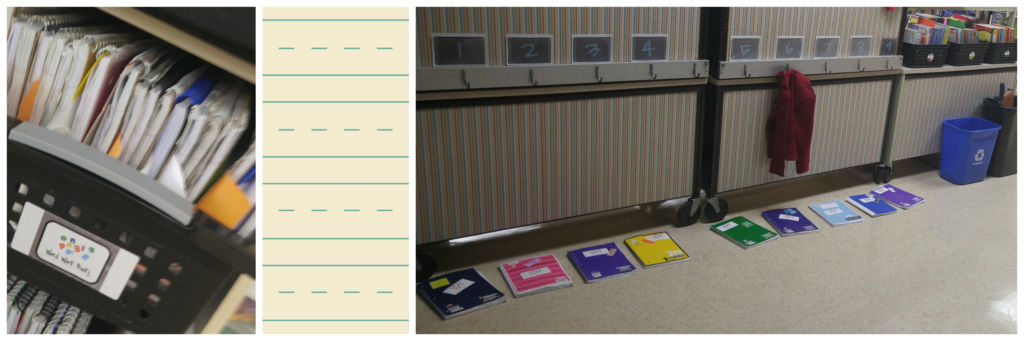
The second set of changes involved when we do Words Their Way. Finding time to add Words Their Way into our daily schedule has been a challenge. Two years ago, our grade level flex grouped during Words Their Way. We divided all first graders into four groups based on assessment and daily observations. The groups changed over time to allow for differentiation. This worked well, but we’re not doing it that way anymore so it has been a challenge finding time. I discovered that like our read aloud time, if something was squeezed out of our schedule each day, it was Words Their Way. Not a good thing to happen! So, I started incorporating it into our Guided Reading time. As I met with students, I’d have them rotate through three different tasks, allowing me time to work with each student individually for their guided reading book. It looked like this:

While some students worked on their “quick write” (guided writing time with me to develop skills and writing fluency), others worked on their daily Words Their Way activity. While these children worked mostly independently, I worked with one child in a reading conference (guided reading). We’d rotate activities every few minutes. I liked this set up, but it was a lot of rotating and I often felt like a circus ring master. In the picture above you can see that I housed each child’s WTW notebooks, quick write notebooks, and guided reading books in their group tub. While this helped solve the “we’re skipping WTW too often” dilemma, I found a better routine that seems to be more suitable.
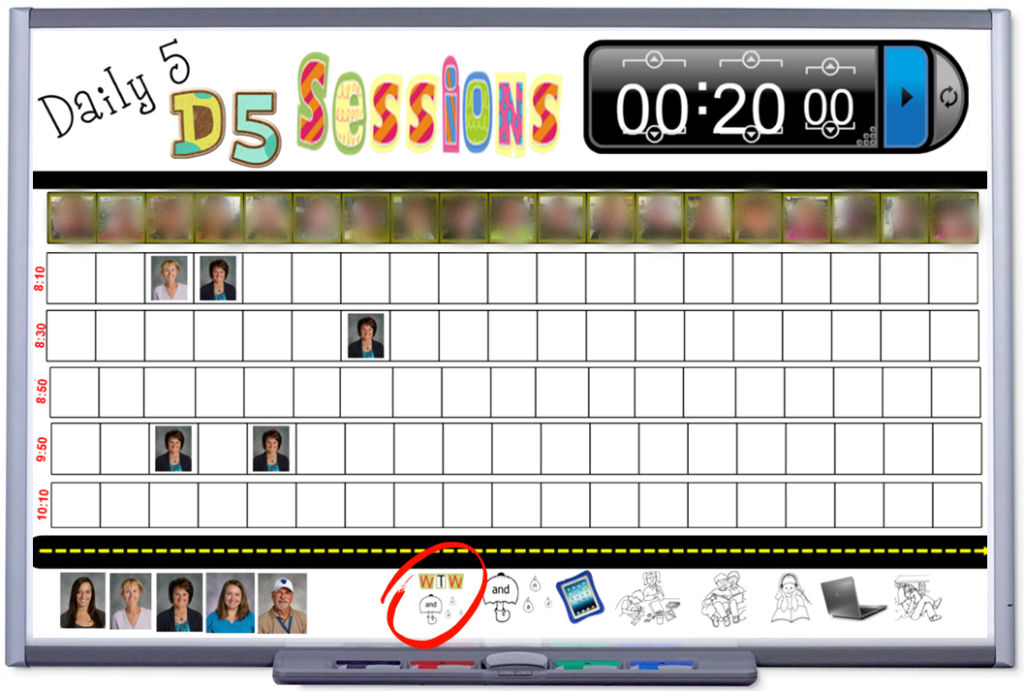
Instead of fitting WTW into our Guided Reading group time, students select it as one of their Daily 5 session choices. Each morning I line their WTW notebooks up, just outside our classroom. Since they don’t all choose WTW for the same session, this works well, and it makes our classroom a little less messy. I can also easily identify the “skippers” (those students who forget to choose it as a session– although they seem to police themselves pretty well). Some take the entire 15-20 minute session to complete their daily WTW activity, while others finish early. If they do finish early, they are allowed to select another session choice.
Finally, I also made some changes in how I prep and store WTW materials. Using a “batch prep” strategy that I learned to apply in Angela Watson’s 40HTW group, I spend one prep, every 5-6 weeks or so, and make copies of sorts. I generally batch prep after assessing students to determine progress made. After an assessment, I reconfigure the groups and make a copy plan. I cut off the sides of the sorts, detach the header, and clip each sort together. The sorts are stored in a multi-pocket poly folder that I purchased from Walmart many moons ago. I label each pocket with the name of the group (blends, short vowels, long vowels, blends, digraphs, consonants, etc). Each label is also labeled with student numbers. This helps not only me, but also for when I have Guest Teachers.
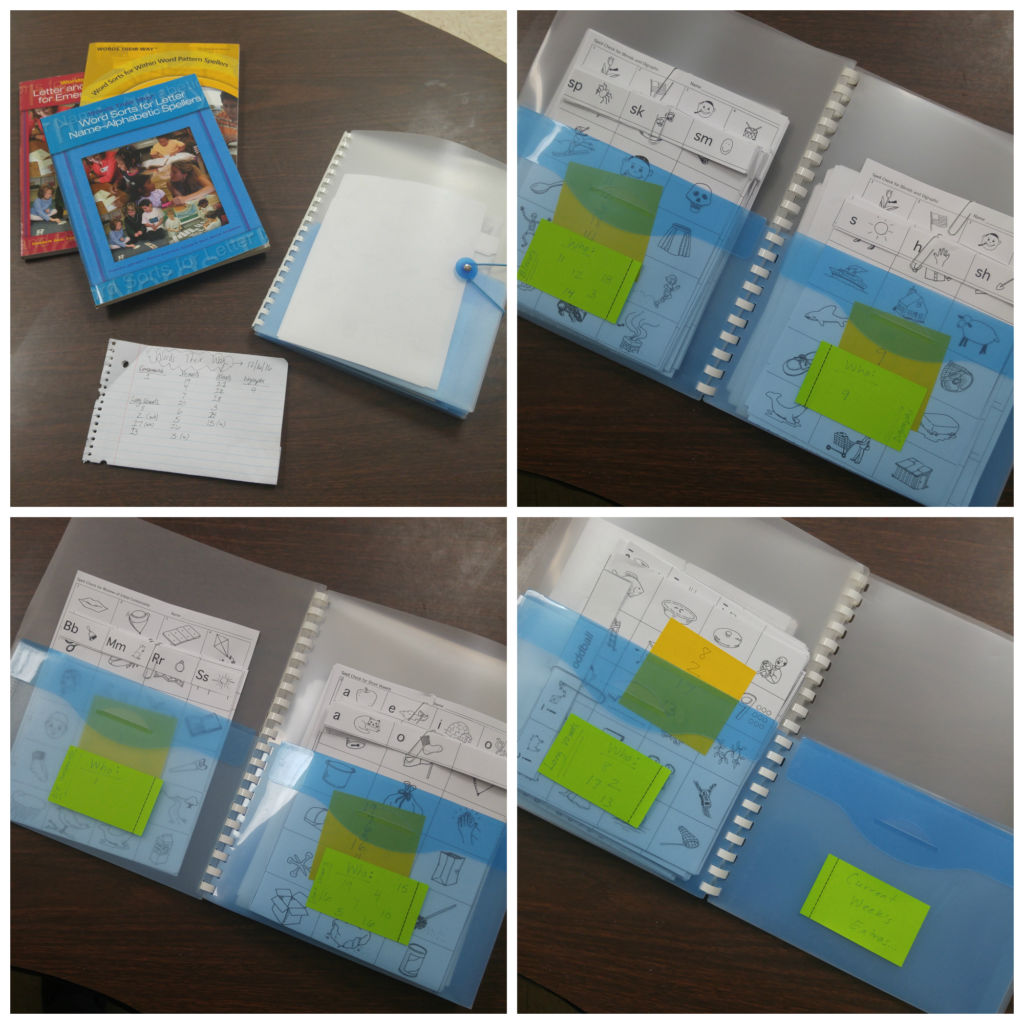
When it’s time for groups to move to a new sort (they typically move at the same time, but not always!), I remove one sort from the folder and display each group’s sort like this:
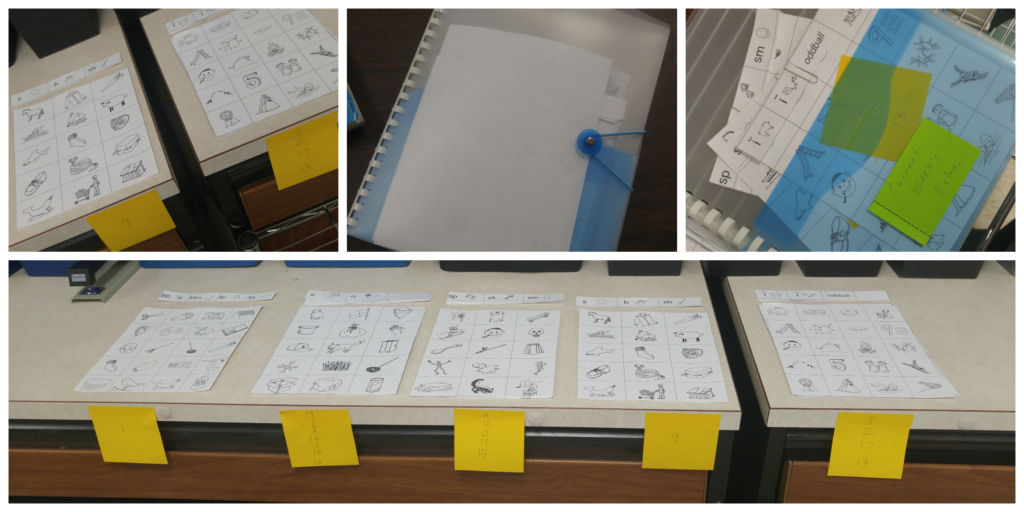
Students simply take their assigned sort (and header) to complete their color/cut/sort activity. When copying, I make 1-2 extra copies of each sort. This has proven to be helpful for situations where a student needs a new header or sort pieces. I store the extra sorts in the poly-folder too. The post it notes are re-used as well and help keep me informed of who is in each group.
Changes 7-8: Daily Activities
- Reduce Daily Activities
- Seesaw Journaling App
I’ve you’ve read my previous Words Their Way post, you’re aware of my SMARTboard organizational system for arranging groups, assigning activities, and training students in learning and applying WTW routines and expectations. While our original list of activities still works, I felt I wanted to streamline our system, especially since students were completing the activities independently, while I worked with guided reading groups. I also didn’t want to lose out on knowing if my students were completing the activities correctly and to assess if reteaching was needed. So, I pared down on the activities we complete for each sort and I incorporated Seesaw, our student journaling app.
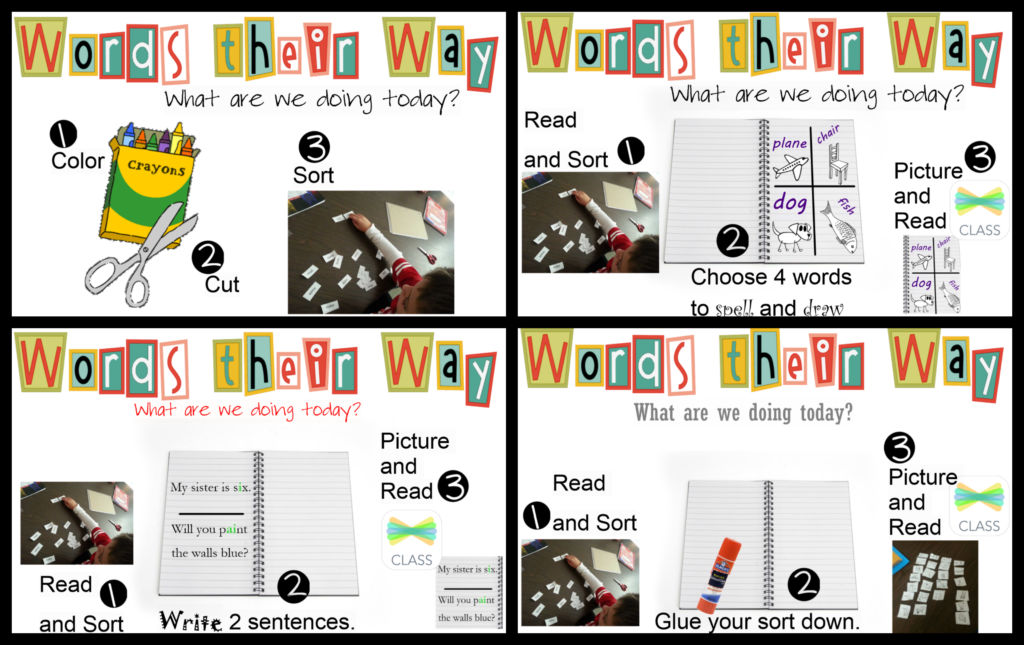
The activities my students complete for each sort involve sorting, reading/naming, and writing. For each sort, students work through the following activities over the course of 5-6 days:
- color, cut, sort
- read/sort, illustrate/spell 4 words, share work via Seesaw
- read/sort, illustrate/write 2 sentences, share work via Seesaw
- read/sort, glue into notebook, share work via Seesaw
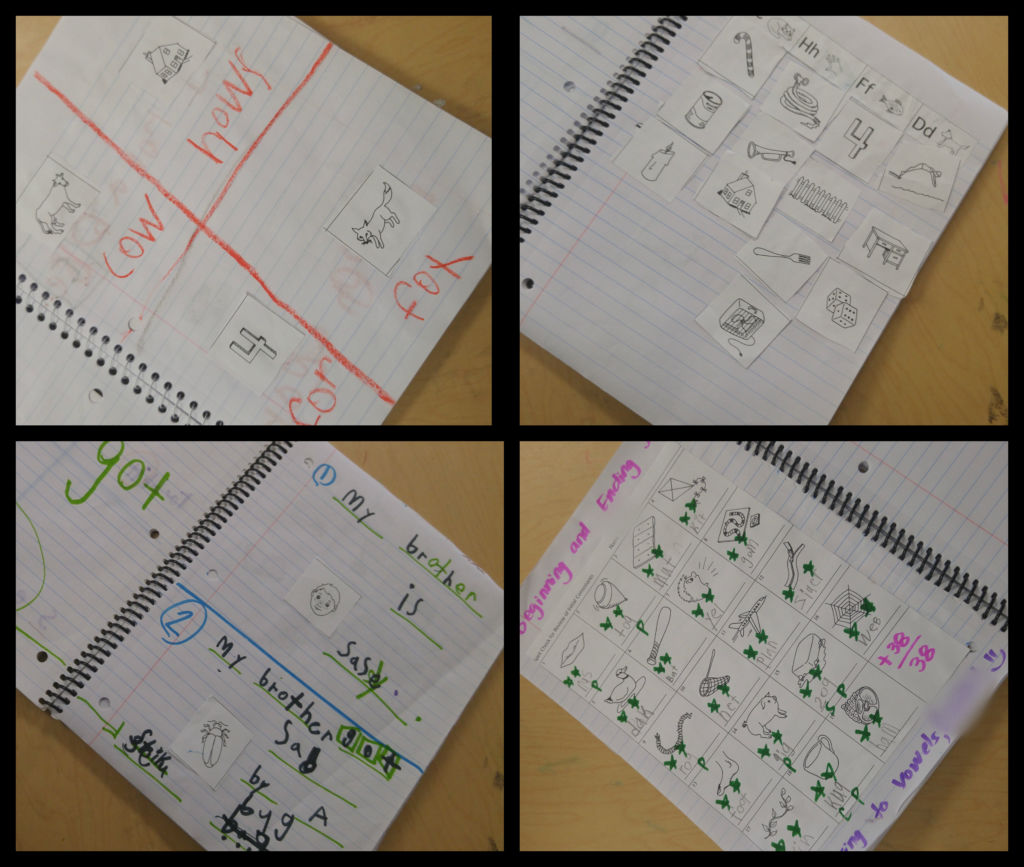
I love having them share their work via Seesaw because it helps me to know if they’re understanding the concept behind the sort, as well as grasping the sometimes unfamiliar vocabulary found within some WTW sorts. If you’re not familiar with the power of Seesaw, you should definitely check this fantastic app out! Check out a sample Seesaw entry below the picture.
UPDATE: check out new REVAMPs I’ve done with WTW, since the writing of this post!
I’d love to hear your process for Words Their Way!

5 Comments
I may be crazy but I miss that we do not do Words Their Way anymore. I have been trying to figure out how to fit it into my day along with everything else.
It’s hard fitting everything in!
Wonderful!!! Is that the only part of the Seesaw app that you use? I wonder if Bloomz has the feature.
I just looked into the student timeline part of Bloomz. Is there something about the Seesaw portfolio that helped you choose that over Bloomz? I already use Bloomz but would add Seesaw if something about it was markedly better.
Bloomz could totally do what I’m using Seesaw for — for Words Their Way. My students are simply taking a photo (some do live video) and adding a voice layer to it. They could also use the annotate feature in Bloomz (Seesaw has this too) to circle each word as they are reading it. In Seesaw you’d see the circling live, as they read it, and in Bloomz, you’d see the circles all at once, along with the voice layer. That’s the biggest difference for me between Bloomz and Seesaw. Seesaw has the live annotating recording feature- it’s a screen recording feature and when the video renders, you see the screen record unfold before your eyes. With Bloomz, you can annotate, as well as add your voice, but when the video renders it flattens the screen notation and makes the final image what you see in the video. Hope this makes sense. Of course, these are the features as of today, 1-7-16. As with any app, they are always changing and that doesn’t mean there will be upgrades/improvements in the future.