
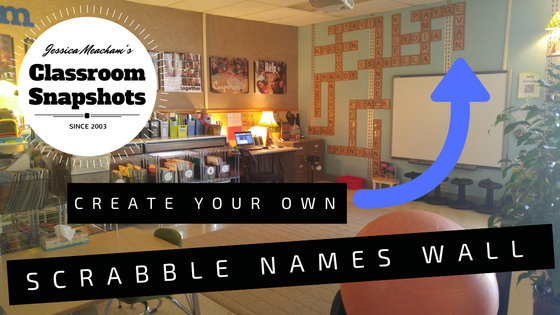
A Scrabble Names Wall has been on my “wish list” of ideas for a few years. I finally tackled it this year and am very pleased with the results! Want to create a Scrabble Names Wall in your classroom? Read on for how I created ours!
1. Count # of Letters Needed
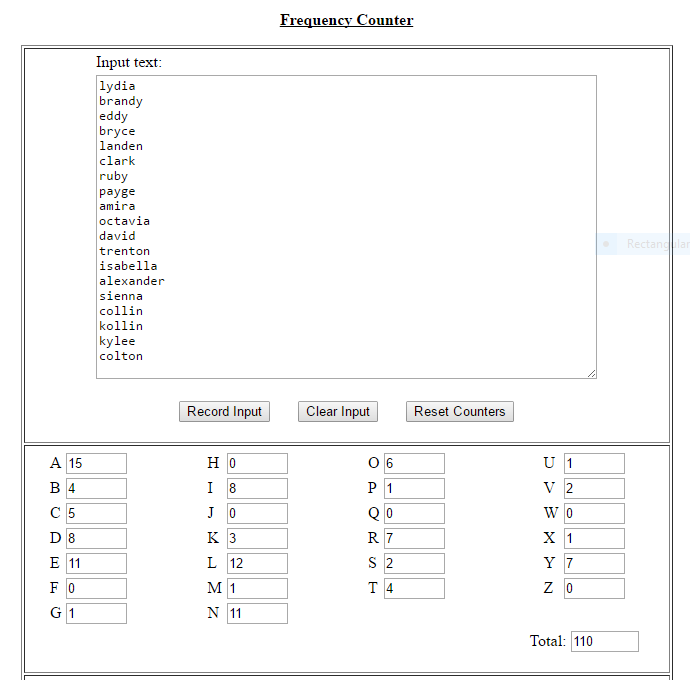
If counting the frequency of letters in your class list seems daunting, don’t worry. There’s an app for that! Using the app, type in your class list and click “record input” and magically you’ll discover how many Rs, As, and Es you need! One thing that I didn’t account for was that names will share letters on your Scrabble Name board. When two names overlap, the shared letter (let’s say it’s an A) will mean you’ll have an extra letter. So I ended up with several extra letters. Oh well, a lesson learned for next year!
2. Print Scrabble Letters
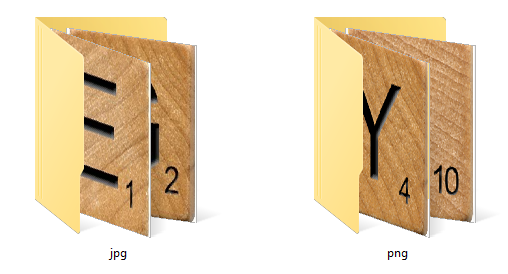
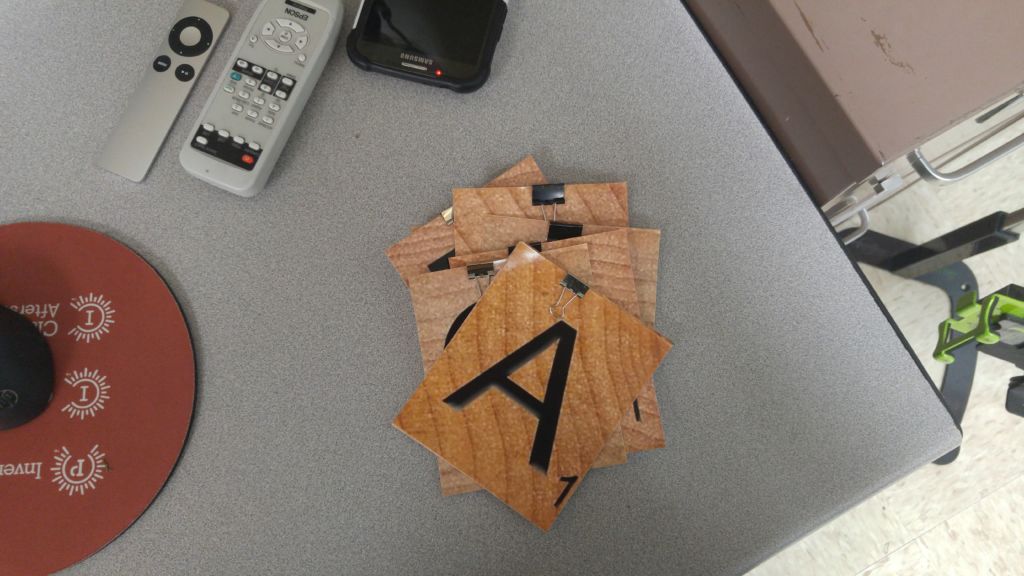
When I was brainstorming for this project, I was thinking that I’d like real Scrabble wall tiles. They were far too expensive on Etsy and in the big box stores. Making them wasn’t possible as I concocted this project the week before school started. I then remembered that I had a font from Lettering Delights that was Scrabble-Like. They UNFORTUNATELY don’t sell the alphabet font anymore, but I’ve shared a few other options for you in the event that you don’t have the Scribble font from Lettering Delights. I downloaded each letter from Lettering Delights and converted them to jpg because I discovered that Walgreens wouldn’t take PNG uploads. You could also print the letters on your printer, but I chose to print 4×6 photos from Walgreens (and then cut the extra parts of the photos off). Be sure to check for a coupon code! They always seem to have them.
- Lettering Delights (no longer available)
- Scrabble Vector Font
- Scrabble Font
- Scrabble Tile Images
3. Plan Out Your Scrabble Wall
Again, let technology do the work for you! Using an online crossword puzzle generator app, type in your list of student names and hit the “generate” button. You may need to refresh a few times to find a configuration that will work for you. Using the example below, I have 15 rows and 20 columns. 15 rows at 6″ is 7.5 feet of wall space needed height-wise. And, 20 columns at 6″ is 10 feet width-wise. So my wall space needed to be 10 feet wide and 7.5 feet high. If this size won’t work for you, use smaller tiles!
- http://www.puzzle-maker.com/CW/
- http://puzzlemaker.discoveryeducation.com/CrissCrossSetupForm.asp
- https://worksheets.theteacherscorner.net/make-your-own/crossword/
With the sites above, you can print a worksheet copy of your wall and have students fill it in as you fill in the wall version!
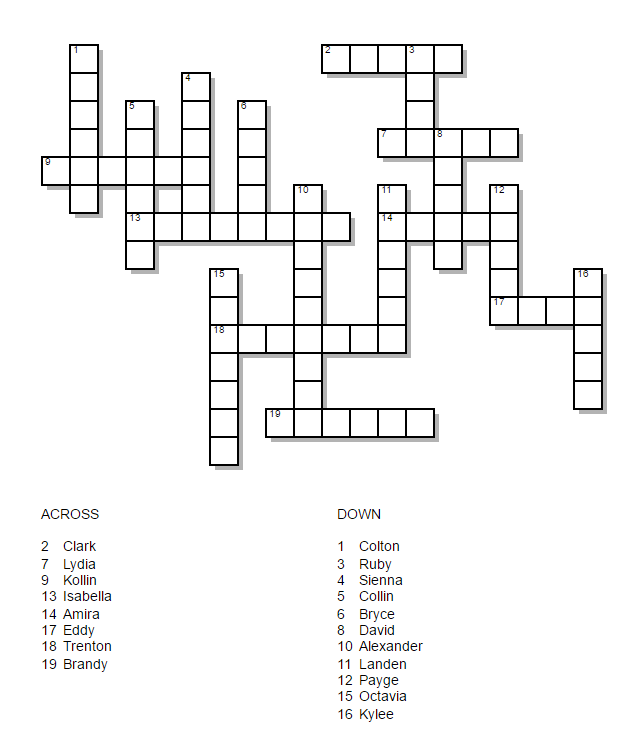
You’ll read more about my class list fiasco later on, but in the end, my final wall ended up looking NOTHING like the above plan.
4. Create Wall Template
Using 6×6 square paper tiles, reference your Scrabble Wall plan and recreate it on your classroom wall. I attached mine to a painted wall using the blue sticky tack stuff. At first I was a little unhappy that I’d have the tracking in the wall showing (the silver wall tracking you see holds up shelving units, boards, etc.), but in the end it helped me to start my Scrabble Wall and stay on track with keeping it straight! Otherwise I’d recommend a level and possibly a chalk line tool.
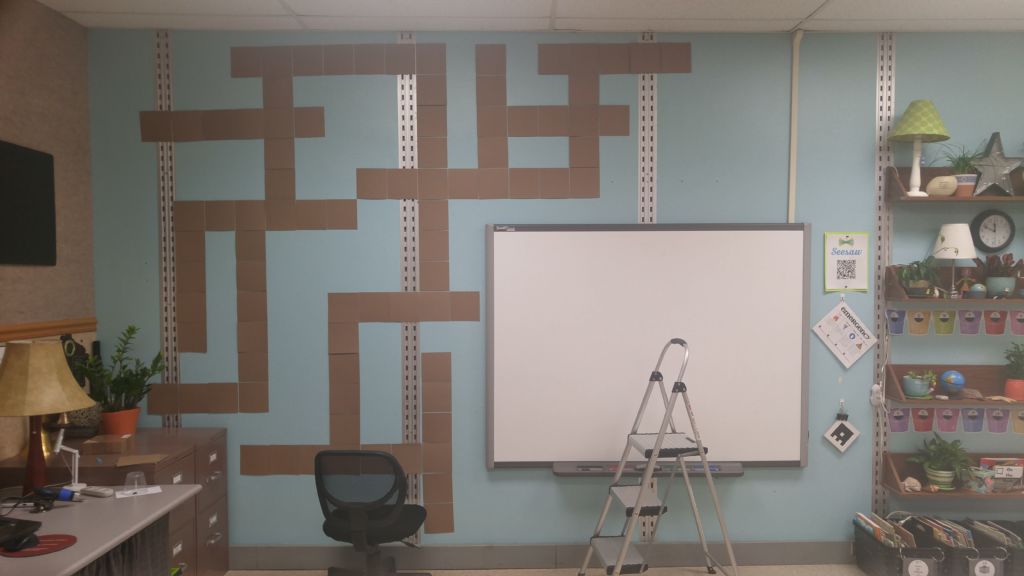
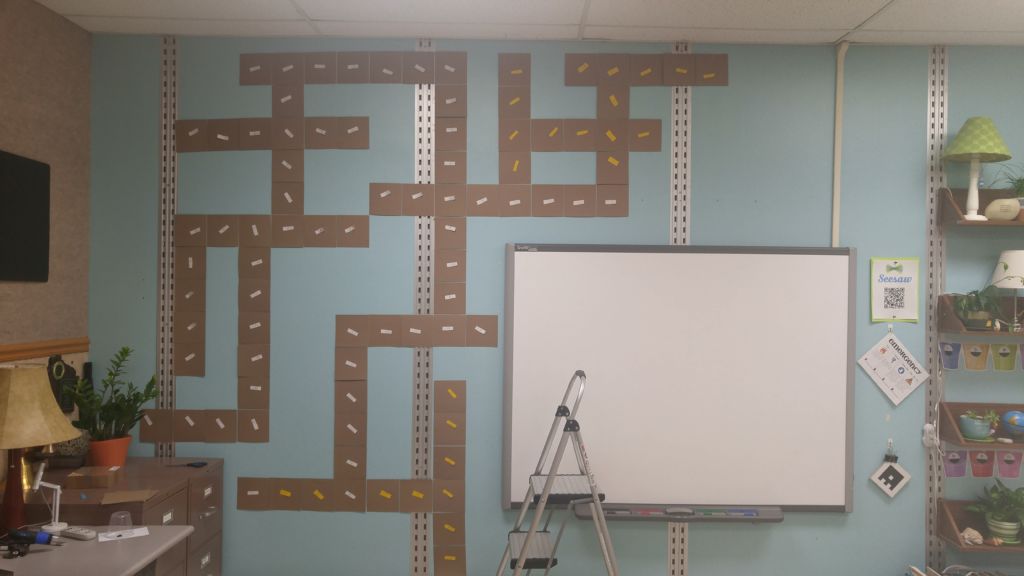
Once you’ve created your wall template, check for accuracy using small post it notes to be sure you have letter and name placements correct. Remove the post it notes prior to the start of school– you don’t want your students knowing where the names should be placed!
You may have noticed that my wall template changed from my plan shared in step 3. I fully intended on using the plan, but I had several changes to my class roster, and I also decided to change where the Scrabble Names Wall would be in our classroom. So I ended up drawing this one up by “hand” using a table in Google Drive. It was tedious, and I recommend using the advice in step 3 if you can afford the wall space and don’t have much change in our class roster! Even after this picture was taken, we got a new student, but luckily his name starts with and E, and we have the perfect spot for him in the upper right hand side!
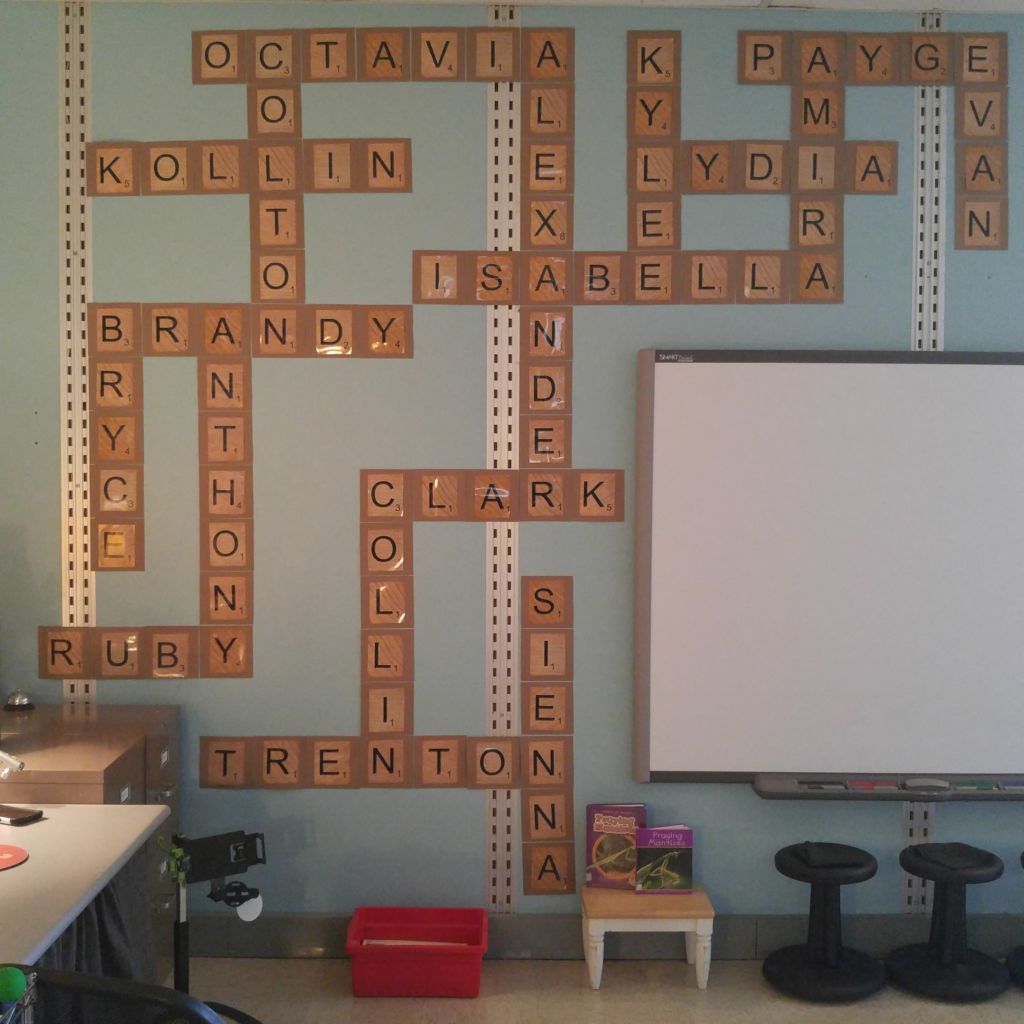
5. Add Names
Finally, the fun part– adding student names! You can have a little fun here and make it a game (when I taught Kindergarten we always did Name Game activities), this is a throwback to those days, but first grade style!
Try these ideas for some added learning and fun:
- Handwriting Practice: As a letter is place, have students practice forming the letter on the backs of their neighbors, on the carpet, or in the air.
- Syllable Practice: As the name is placed, clap out the syllables in the name. Start a Classmate Names Syllable graph.
- Vowel Practice: As a vowel is placed, identify if it is a long vowel or short vowel. Start a Long/Short Vowels Names graph.
- Words in Words Practice: Before placing the name, use the letters to find words in words. Create a Words in our Names book.
- Analyzing/Predicting (Educated Guessing): Before placing the name, say, “Whose name could share the A in Anthony?


3 Comments
Ingenious! On my to do list. Thanks for sharing.
Best wishes!!
Thank you so much for this! Doing this at home for my family and this was very helpful!